Once you have downloaded your Divi template or landing page, and you wish to change its language (from English to Spanish or vice versa), this tutorial will guide you step by step to achieve it. To change the language of the template, first, you need to set the WordPress site language to Spanish or English, and then, adjust the text in each text module within the design using the Divi Builder directly. Follow these steps to successfully perform the translation!
Step 1: Change the WordPress Site Language to Spanish or English
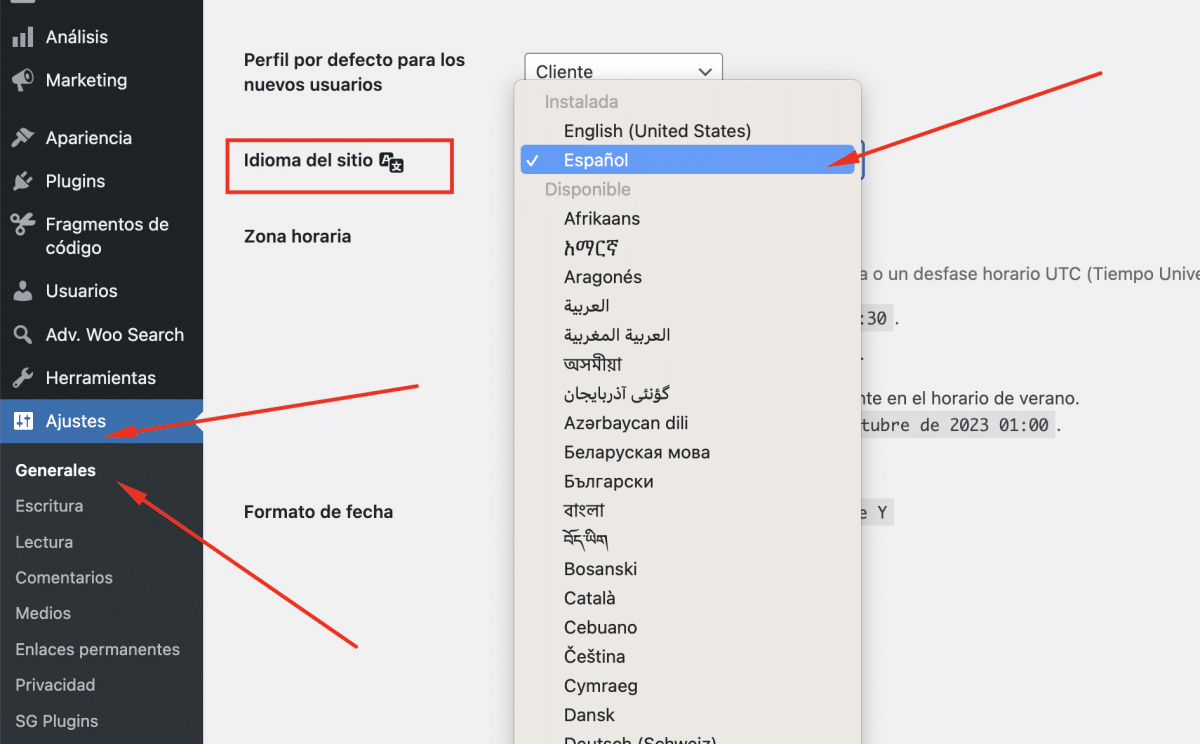
- Log in to the admin panel of your WordPress-based website.
- Go to “Settings” in the left sidebar and select “General”.
- Find the “Site Language” option and select “Spanish” or “English” as needed from the dropdown menu.
- Click the “Save Changes” button to apply the new language.
Step 2: Access the Divi Builder and Translate the English Text
- Navigate to the page where you want to apply the translation in the Spanish language.
- Click on the “Use Visual Builder” button to access the Divi Builder.
Step 3: Translate the English Text Modules
- Select an English text module that you want to translate.
- In the right-hand sidebar, scroll down and find the “Module Content” section.
- Enter the translated text in Spanish in the corresponding text box.
- Repeat this process for each English text module present on the page.
Step 4: Save the Changes
- Once you have finished translating all the text modules, make sure to save the changes by clicking the “Save” button at the bottom of the Divi Builder.
Congratulations! You have now changed the language of your UXDIVI Templates. The content in English has been successfully translated, and your website is ready to be enjoyed by your Spanish-speaking audience.